You have no items in your cart. Want to get some nice things?
Go shopping
The most basic compositional element is our lines. If you learn how to work with lines in your culinary images, you will never struggle with your compositions. It sounds exaggerated, but it’s true. When I say “lines” I don’t just mean actual ones, like a chopstick. We have many elements in food photography which “act” as lines, such as cutlery, a long baguette, thin slices of bread like I used here, the stalks of greens, rhubarb stalks, even things like the edge of a table or the back of a chair. We use lines all the time, often unconsciously.
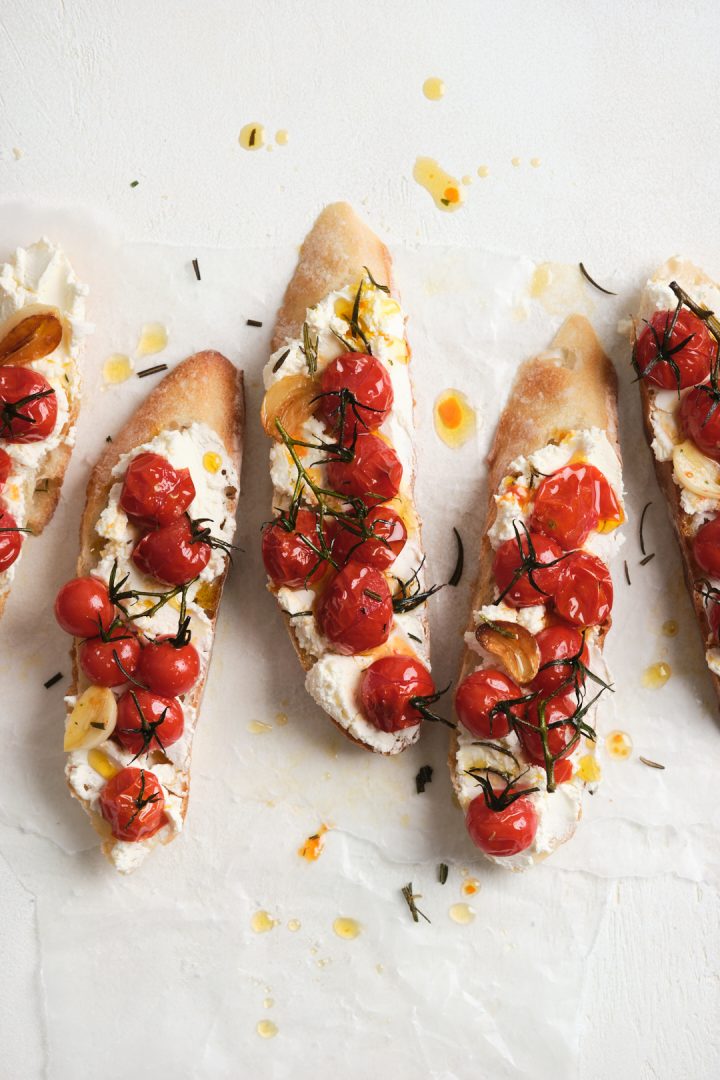
Take as an example the first image in this post. Each slice acts as a line. I arranged the slices of bread as vertical lines, to create a dynamic image with a lot of negative space top and bottom. The negative space balances out the bread, as the slices are placed fairly close together. The bread and tomatoes are very textured whereas the other areas are smooth. This is a way to create balance in the image: some areas will be smooth, some textured. Busy areas balanced out with negative space.
I deliberately created this flow: / \ / \ with the slices of bread. You’ll notice if you look closely. I avoid parallel lines, as they pull the eye and feel too staged. When you are placing cutlery, chopsticks, straws in drinks, aim for a natural feel and avoid placing these items parallel to one another.
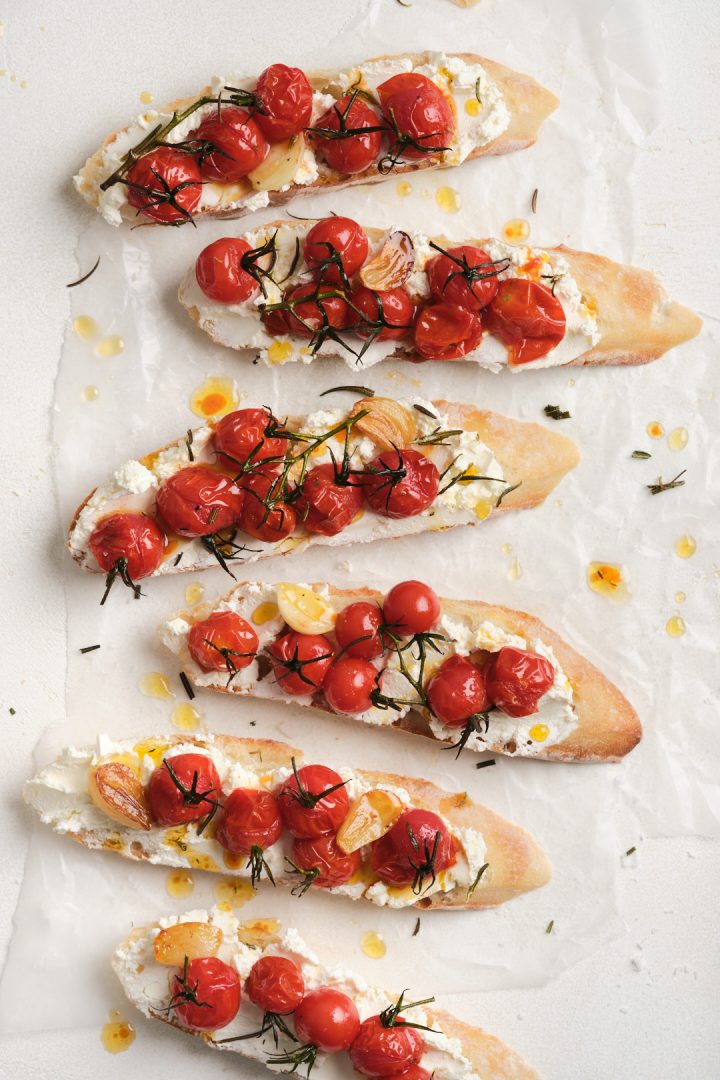
Now let’s look at the same subject, positioned in a different line pattern.

In this image, the vibe is different. More slices, more busy, less negative space. The pattern of lines is similar, only done horizontally. Again, nothing lining up exactly, and each one different.
Vertical lines versus horizontal lines and visual flow
Vertical lines move the eyes up and down through the image, whereas horizontals help move the eye side to side. Also, vertical lines convey a sense of height. Horizontal lines give a sense of calmness and stability, like a strong foundation. Diagonal lines are dynamic, and they convey a sense of energy and movement. I often compose based on a strong diagonal, as this can create beautiful flow in an image.
Lines (whether actual, or optical, a.k.a. implied) don’t need to be straight either. S-curves are a frequently used composition technique, and when elements are placed in the frame in an implied S line, this creates a visually pleasing result.
The orientation of your dominant lines in your frame can help you decide on the orientation you are shooting the image in, especially when working to the requirements of clients. Have you tried shooting a pour shot in horizontal orientation? It is an exercise in frustration.
That’s because the upper and lower edges of the frame seem to be pushing down, “squishing” the pouring action, instead of allowing it to have an expansive feel. Ask a landscape photographer and they will confirm too: the most successful images are those where the orientation (horizontal or vertical) follows the natural flow of the lines in the image.
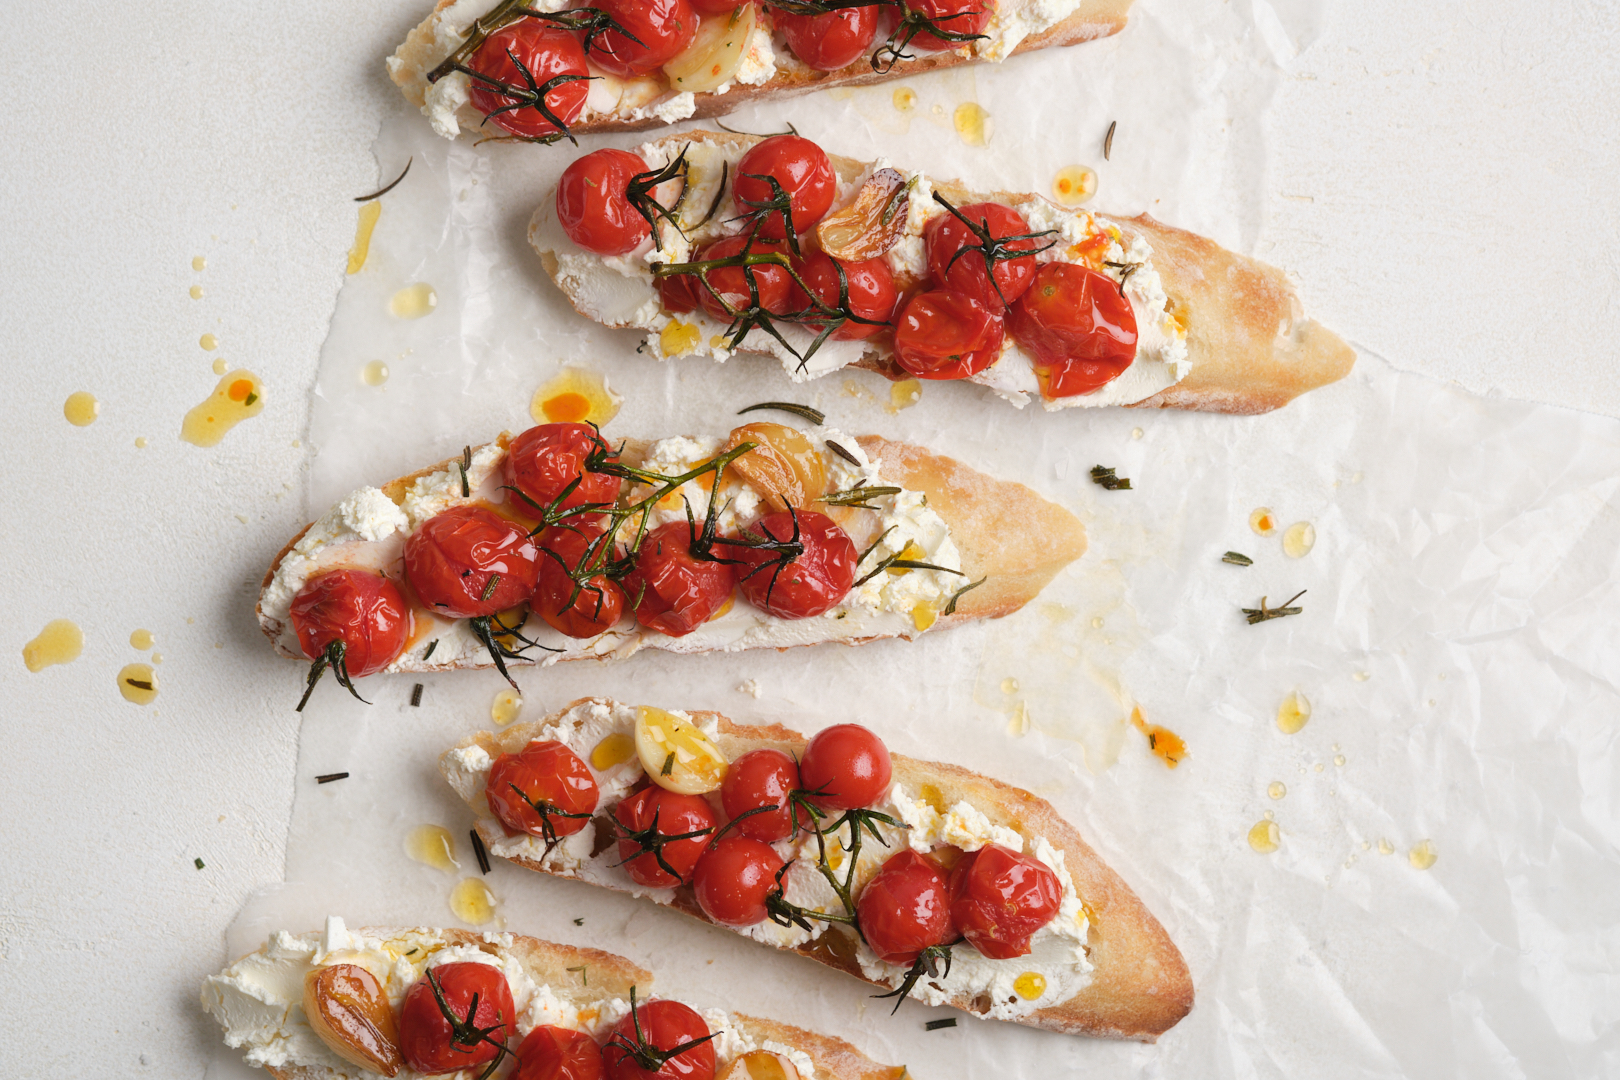
Let’s see how this translates into the next image. I’ve kept the slices horizontal, AND changed the orientation so the frame is now in landscape (a.k.a. horizontal) orientation too.

This image feels like it flows nicely, and the direction of the slices works with our horizontal frame.
There is so much to say about lines in our food photography compositions, and I hope this post has given you some helpful insight. Leave any questions you have in the comments.
If you would like to make these (super photogenic) tartines, then here’s how to do that:
- slice a baguette on the bias into long slices; toast if desired, but I didn’t for these images
- spread the slices with your favourite cheese (or vegan cheesy) spread (here I used the Paysan Breton Madame Loik dairy spread, but sometimes I make my own cashew cheese; softened goat cheese works too)
- roast cherry tomatoes like in this recipe I posted a while back
- when the cherry tomatoes have cooled down, arrange on the bread slices
- as a final touch, drizzle some of the lovely roasting juices over the bread. Enjoy!
Until next time!